Showing posts with label teabag art. Show all posts

Monday, August 3, 2026

Another Teabag Critters Attempt

 I totally forgot about this page of teabag critters from back in April! I thought I probably found the critters within and forgot to make a picture, but when I went back to the sketchbook, I hadn't. Then I remembered that I put the wet teabags on a different kind of paper than I used before, and I didn't get as good a result. The dried images were pretty much just solid blobs with few lines, although I did see images in a couple of them, plus the color wasn't great either, so I'm not going to finish them. Instead, I tore the page out and put it in my collage paper box to be used some other way. So that's that! I will try the teabags again on better paper at some point, because it's a fun project...

See a previous post for better results and more about the teabag critters. I think next time I will put each teabag on an individual square to dry and see how that goes.

Last post today, I promise!

Sunday, March 1, 2026

Pareidolia-Teabag Stain Images

 Pareidolia: When you can see images within images, which I love to do...

I've been seeing art on Instagram where images are drawn out of teabag stains, much like the sidewalk cracks a few posts back, so I gave it a try.

I did these while I was doing the art practices in the Jots and Tittles journal in the last post. I worked on them in between the journal pages.

There's not a photo of the first page of teabags, but I took eleven teabags right out of the boiled and steeped water, without squeezing out any water, and plopped them all on one page in my new Winsor Newton mixed media sketchbook. They were left to dry about twenty-four hours. 

They were supposed to stay until completely dry, but I got impatient. Besides they had already left a good dark stain, so I took them up. They were not soggy, but still wet enough to do another page, and this time I spread them onto two pages (below) and left them until completely dry, before pulling them up. One page is stained rice paper. 


I went back and re-watched the video and found out that when you take the teabags out of the water you're supposed to gently squeeze the water out of them before plopping them down on the paper. Ideally, you use a small paper/card for each teabag, because you have to turn the image to different sides to find the image that's hiding. 


The first page of teabag stains from the very wet teabags.


The images I pulled out from the first page stains with a small Micron pen. Some are upside down and/or sideways, because I had to turn the page to see them, which is why each one should have their own paper.


This is the second page with the semi-dry teabags. I only used six on this page, which gave me a little more room.


Again, I had to turn the page to find the images, so they are every which way.


The other five semi-dry teabag stains on rice paper. I forgot how absorbent rice paper is, and some of the tea soaked through onto a second page and into the magazine it was laying on, so these stains are very pale in comparison to the other pages, but still plain enough to see images within. I will use the stained second paper for another project!


I found these images hiding among the stains. I love all these critters/characters, and I only used mostly lines, but some of the artists add in shading and details, so they look more like art pieces. Fun stuff!

I piled the dry teabags into a pie pan and later emptied them out and flattened them out to use in other projects. The driest, most shriveled ones are from orange spice teabags, which are kind of sticky and hard to empty when dry. I used a variety of bags to see how they would do, and they all worked beautifully. I will be doing more! 

Anyway, that and my Jots and Tittles journal is what I've been playing with lately. Hope y'all are getting in some creative time, as well! So many new things to try and so little time...

Sunday, May 11, 2025

100 Days of Stitch Meditations-#69-74/100

 Six meditations from the first of the week. I have done three others since these, but they aren't scanned in yet, so I actually have nine done so far. Only 23 to go!


#69-pink and turquoise scraps from two of my old blouses, scrap from an old favorite sheet, perle cotton threads-Kind of reminded me of a little dog shape, so I gave it a face!


#70- red scrap from my old blouse, yellow scrap from who knows where, The buttons on the red are actually a soft yellow and the red has a darker pattern in it. I just couldn't get them to show up. :( The drawn thread piece is from a worn out set of pillowcases that my grandmother gave me probably sixty years ago. The pillowcases were worn out years ago, but I saved the ends with her thread work. Love it and miss her! :) perle cotton thread


#71-Striped base from my old shirt, asian scrap from another project, hat brim is white cotton that I stamped a mandala on, button is from an old sweater, perle cotton thread


#72- purple from my old shirt, coral from my old blouse, lace from an old expensive bedskirt found at Goodwill, perle cotton thread


#73-Base from my old blouse, blue scrap from my old pajama pants, two pieces of cotton that I tea dyed, perle cotton thread


#74-Base from my old shirt, cotton with text print, a used teabag, perle cotton thread

So that's it for now, and we're waiting on company to arrive, so see ya in the next post!

Tuesday, June 4, 2024

Hidden Paper Clips, Journal Spread, and Empty Teabags

 This is the results of the last few days of dabbling with my creative stuff, minus a couple of sketches that I'll share in another post. At least I'm trying! 😀 


I covered two more large paper clips and one in a different way and added some collage pieces and words. They actually look better than they're showing up here. One has a navy blue ribbon,  one a fabric tie, and the "nest" on the one on the right is actually red, not black. I used a dangle earring on the one on the left for the time being, until I can get a beaded dangle on it (I'll have to unearth my beads first). I'm going to use at least one of these in my mini junk journal, and I want to make some more! That's a food sticker under the clips. I can't resist saving them!


This is another spread in my little junk journal. The page under the paper clip is the front of a thank you card from our nephew and his wife. It has metallic gold speckles in opposing corners on a pink background, and this cute little stamped girl fit right over the words. The back is blank for writing, and the page under it is a text page with marbling. I may tweak it a bit at some point. The page on the right is a page of typewriter letters printed on pink cardstock with another strip hinged to it with dotted duck tape. Except for the collaged flowers it is also blank for writing. I saw the bird idea somewhere and was inspired to make one out of large and small round paper punches and scrapbook paper. When the hinged part is closed the bird's head sticks out. I like it!


Here is a box of used and emptied teabags that I learned a valuable lesson on. I have been drying and saving used teabags for a long time. However, I thought they would be ok until I could get around to emptying them, and I had a LOT of them in a bag, some in a ziplock bag. 

The other night I decided to empty them. Some of them emptied without a problem, but some of the herbal teas, especially orange & spice and peach tea, had kind of dissolved together and wouldn't come out without tearing the bags, plus they had tiny holes where bugs had been eating. The ones in the ziplock bag had molded from condensation. I emptied this box full, probably a hundred at least, until I got tired of picking through them and trying to untangle the tag and strings (I had to tear them off most of the bags), so I put these in this box, which is more than I'll probably use, and tossed the rest. 

Moral of this story: Let the teabags dry completely, then empty them BEFORE you store them! I left most of these in tack (folded), but many of them will be flattened out to use. There are so many great ideas for them on youtube, and I will dry some more of the orange & spice and peach teabags, because they make pretty pinkish colors when dry, but I will empty them before I store them next time!

Anyway, just sharing some fun stuff I've been playing with the last few days! Today, I played with some beeswax crayons in my sketchbook. Found them when I was looking for something else. Had completely forgotten about them! I've also been wanting to do some more meditative stitching. I found one I had started a while back, so it may show up on here soon! But that's another post...

Thanks for visiting! Hope you enjoyed it!

Wednesday, May 22, 2024

Mini Junk Journal Pages and Teabag Image Trial

 Even if I'm not actively creating, I'm continually filling my well by looking at other artists, work and videos. Part of the fun, to me, is learning and figuring out new stuff, and I've been learning and applying new things in my Mini Junk Journal as I work on it. I've added quite a bit of stuff to the pages since I showed you the last time. Below are two of my favorite page spreads and new techniques so far.


The page on the right is a technique I just learned from a Youtube video made by Treasure Books called DIY Transparent Embellishments with Tea Bags, https://www.youtube.com/watch?v=epqnSVpos-U and I love it! I just used a random scrap on my desk to practice with, which happened to be a napkin scrap with the top layer already separated from the other layers. It needs to be a thin paper image (napkins, tissue paper, etc. and non-glossy). I used a used tea bag that I had already dried, emptied, and opened flat. I also used wax paper to work on so it wouldn't stick and would peel off easily when dry. Any non-stick surface would work though.

I think the lady used a glue/water mixture, but I used regular gel medium, which happened to be glossy, because I'm figuring things out and using what's handy. Anyway, I tore the image out of the napkin, brushed a thin layer of gel medium down on the wax paper, then lay the image down on top of it and brushed the image down with a little more gel medium before laying the tea bag on top and brushing gel medium over the whole thing. Then I took the brush and scrunched up the edges and flattened them (like she did) and left to dry. When it was dry I peeled it right off the wax paper and it was ready to use!

I only made this one, so far, as an example, but she made several showing different ways and things to make them. This one is currently held to the page with a paper clip, but I like it here, so I think I might sew it to the page on three sides and make it a pocket to hold secrets!

If you love tea bags, you should check out her video and see how it's done much better. Great ideas! She also has some great videos on junk journaling ideas and techniques! I will definitely be making more of these and trying some of her other ideas...

The other page is a piece of muslin, I think, which I used a wooden fabric stamp from Hobby Lobby to stamp the elephant on with. I stapled it to the journal page with blue staples, and when you lift it up there is a blank page to write on. I will eventually add some stitching or something to the bottom of the fabric, because it still needs a touch of something. It will show me what it needs at some point. 


The left page is a book text page, which I had practiced marbling with shaving cream on sometime back. It kind of clashed with the other page, so a couple of days ago I tore a section out of an old paperback dream interpretation book and glued it across the page. It helped, but not enough. Then yesterday I noticed the writing on the cover of a scrapbook paper block was the same dark blue as the page on the right! So I glued it at both ends to make a belly band, and now I can slide notes I've written, or "keepers", under it for safekeeping, plus it makes the pages a little bit more cohesive!

The page on the right is actually a blank thank you card from someone's wedding that didn't happen, or they were left over, they changed their minds, or something. Several years ago, I found the whole box of matching invitations, thank you cards, ribbon markers, envelopes, papers, etc., brand new, for a couple of dollars at Goodwill. All are in the colors of indigo and cream, which I love! The couples' name and address are still on the box. I'm sorry if things didn't work out for them, but it sure gave me a lot of pretty fodder for paper projects!

Anyway, one of the thank you cards became two pages that just fit my little journal! I loved the page, but it needed a little something else, so I found a blank note card from a set of cards with old master art prints on them, that my mom gave me years ago for a birthday. It had a Monet print on it and I cut the lady with the umbrella out and glued her on the page. She helped, but still blended in a little too much, so I went around her with a black marker, and didn't do a good job, but it is what it is, at least for now. The lace on the edge is actually much wider and shows up really well when the book is closed. 

My little journal is getting very chunky, as I keep collecting and adding new techniques and ideas to it! I'm almost to the point, though, that I'm going to stop adding things, per se, and I'm going to do some writing, mark making, and other stuff that won't add to the thickness of the book.

So, this is one thing I've been doing since my last post, and in the next post I'll share another thing I played with the last couple of days! Besides watching how-to videos...

Friday, November 27, 2020

WIP Teabag Pages in WM Journal

The last painting I did in my Wandering Muse Journal (see sidebar for link) was a few weeks ago, and I added some paint to my teabag ladies pages. Just haven't been feeling creative...


Still very much a work in progress. It may be after the holidays, but I'm looking forward to working in the journal again. I still have pages to finish and a few more blank pages to fill!

Thursday, October 8, 2020

A Few More Journal Pages in Progress

 Y'all know that I'm kind of a Jill of all trades and master of none, and I can't stick to just one thing at a time. I also tend to do things in spurts, which accounts for the posts about several unrelated projects that I happen to be working on simultaneously. I often wire wrap a fabric bead, or two, stitch a meditation, stitch a bit in my fabric journal, and add a layer or two to an art journal, all in the same day, as ideas occur to me. I can not enjoy working on one thing from start to finish before starting another, although I admire those of you who can. Of course, I have many half-finished projects laying around that will probably still be unfinished when I die, because I have reached my 71st birthday if I live one more week, and time is moving faster all the time. Anyway, for now, my creative efforts help keep my mind working, they're good for my nerves, and they help keep me sane in this chaotic present world.

So, besides the last posts, I've been adding to my Wandering Muse Wire/Plaster journal (see sidebar for link). I've laid the foundations on a few more pages in the last several days. None of the pages in the journal are completed yet, but I have a start on most of them now. Still very much works in progress!


I painted these pages with acrylic pyrole red for an undertone and stenciled the harlequin pattern with burnt umber, but I loved the harlequin and hated the red, so I tried to remove it, which left bare strips down to the gesso/marble dust mix. Since I didn't want to spend all day trying to get the paint off, I painted a layer of transparent nickel azo gold, I think, over all of it, which warmed it up, and I left it for a few days. It called for blue, so I hand painted the pears and glued down the eggs/nest, which I had been wanting to use for a long time. Waiting to see what comes next! I like it so far...


This is another mess-up. I tried to use the three alcohol inks, thinking they would mingle together into something pretty and interesting for a background. Only, they didn't. They sank immediately into the gesso/marble dust mix and stayed big mis-shapen blobs. Not pretty, or interesting, so I painted a layer of cad red lt over the pages to cover it, but the ink bled through. Then I painted a landscape over the red in acrylic open media paints, but the inks still bled through, so this is where it is for now. Not sure whether to try to fix it, or leave it as is. It does give the landscape kind of a magical look. We'll see what happens!


Another imaginary, but familiar, landscape painted with acrylics over a pyrole red undercoat. I'm not loving it at this point, but can't wait to see how it evolves from here!


These pages are kind of a mish mash of random paint marks, collaged rabbits, stenciling, and an ink/pencil imaginary portrait in progress.


The first page, which I've collaged a black and white printed off old photo of myself. A selfie the old fashioned way, with a camera on a tripod, because I'm that many years old! The quote is torn from an old magazine, because it fit!


These pages started out with a layer of black gesso, over which I glued down a napkin with gel medium, then added some rings with a bottle dipped in red paint. I didn't like it, which explains the turquoise layer of paint over everything, and I added a printed off photo of me, as a child, with my doll, Suzy, whom I got for Christmas that year. I cut the figures out of the photo before pasting them down, and I know I'm going to add a bit of color to them, but I'm not sure yet about the rest of the journey for this story!

So, as I was applying the gesso/marble dust mix to these pages, I adhered the face sketched on a teabag to the bottom left corner, and she sat alone until last week, I added the long girl teabag on the right and sketched her dress over the page. I had about twelve of the sketched faces on teabags from a Jeanne Marie Webb class (see sidebar) a couple of years ago that I never got around to painting, so I thought, why not use them here? Since this photo, made over the weekend, I have adhered the teabags to the pages, drawn their clothes out onto the pages, and added a layer of paint to all of the girl faces and a layer of paint to all of the clothes, except the two in the middle on the left page. That was at the first of this week, and though I've been wanting to get back to them, I haven't yet. But I will!

As you can see, I don't have a particular theme for my journals, or anything else, for that matter. My husband says I fly by the seat of my pants about everything! There might be a theme when it's finished. There might not. But it's all good! It's about the journey! 

Stay safe and creative, and do something that makes you happy at least once a day! It's good for your soul!

Sunday, October 4, 2020

What Else is on My Dining Room Table?

Working on my Wandering Muse journal pages. in progress! Working out the placement for these tiny teabag portraits that I sketched a couple of years ago for another class and never got around to painting. Now, they become part of my journal and will finally get their paint on! May take a while though...


Wednesday, October 30, 2019

Teabag Fabric Dying Trial

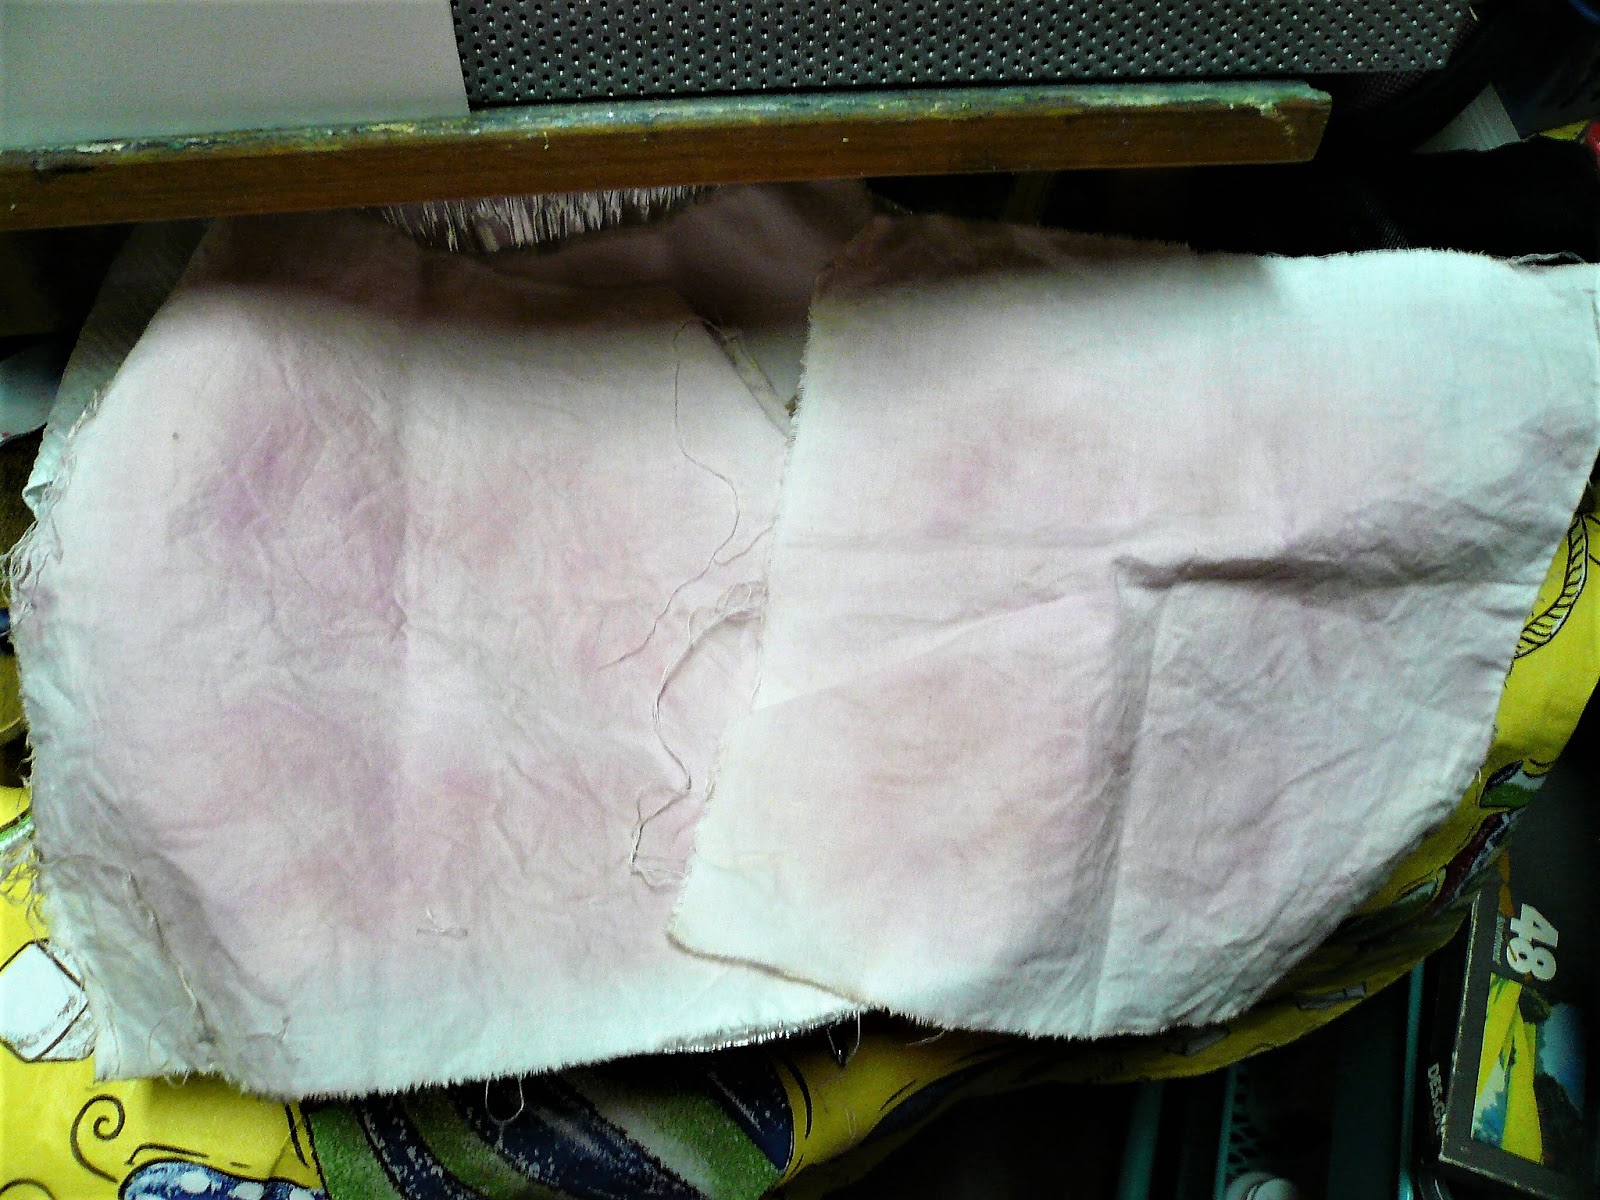
I often lay used teabags on paper towels to dry when I take them out of the tea cup, and they dye the paper towels all these beautiful shades and colors, depending on whether it's regular or herbal tea. Well, I got the bright idea to try it with white cotton fabric.


 1st try-2 org/spice tea bags, 2 stacked cloths dampened and laid in a pie tin-I kept moving the wet teabags around on the top cloth, letting it absorb into both cloths and the color spread out, leaving a pale pink tint on both cloths. The color is much deeper on a folded paper towel, and much prettier.


2nd try-1 org/spice and 1 lavender lemon teabag, dry cloth, pie tin-I thought maybe it would do better on a dry cloth, so I tried a single layer in the tin and moved the teabags around a little every once in a while, and left them overnight. The lavender lemon teabag barely left a yellowish tint, and the orange spice left a darker pink where it lay overnight, with lighter tints where I had moved it around to start with. 

Not really happy with either result, but I will use them to do stitch meditations on. They will be good for that if they don't keep fading on me, but if they do, they'll still be ok to stitch on. If I want the whole piece dyed, I will boil the teabags and soak the cloth in the hot tea.

This was an experiment, and I tried and learned, so I didn't fail, but I will do some research before I try it again! 😁

Don't be afraid to try and experiment! 

Monday, August 12, 2019

10th Mindful Stitch Meditation-Gelli Printed Tea Bag Sunflower


So, this is my 10th piece, and I wanted to try something different, so I used my mini oval gelli plate to do a ghost print on a teabag when I printed the first print on fabric for meditation 6 in a previous post. It left kind of an abstract print on the teabag. The cotton piece with the sunflower is a piece from an old discarded blouse.

I lay the teabag over the sunflower and pinned it to stitch. Thinking it was a bit too long, I cut a strip off both ends of both fabric and teabag, but what was left didn't look right, so I took the pieces I cut off and rearranged them and hand stitched them back on. Then I happily followed my needle and embroidery thread around the piece, not worrying about perfect stitches and patterns. So relaxing and fun!


I think it is about 3 1/2" x 4 1/2" finished, and I ironed craft pellon to the back before stitching, except for the edges. I wanted the edges to frazzle!

I have 10 of these so far, and I've been thinking of a way to use them, besides a quilt, which would be great, except I don't enjoy quilting. I tried, today, laying them out on a strip of white cloth like on a role/scroll, which looked good. I've seen some amazing roles on Pinterest. So that's a possibility!

A fabric book has been in the back of my mind since I started doing the meditations. I already have two started, but this afternoon I cut enough white cotton fabric pages for fourteen of the meditations. Now to figure out how I want to put the pages together in book form! Fun stuff!

Maybe I'll stitch enough for a role and a book both. We'll see!

Meanwhile my work room remains topsy turvey and my supplies in boxes, because it's way too hot, even with air conditioning to continue working on putting it back together!

At least, I'm still making stuff, and excited to see where this venture of stitching goes!

Stay tuned!

Saturday, August 4, 2018

Tiny Bags of Love-Class exercise with toned backgrounds

Recycled Green tea bag 2 1/2" x2 3/4"-mixed media=Tiny Bags of Love with Jeanne Marie Webb (link on sidebar)- Toned bag with red ochre acrylic and sketched with stabilo pencil after sealing with clear gesso-Don't like the clear gesso texture- Mixed media, with acrylics, pencil, gel pens, pan pastel, liner bottle

These 3 bags were one of the class exercises where we painted a colored background for tone, then sketched and painted our faces. I, however, forgot to make pix of that part with the first two


toned with red ochre, gold leaf pen and metallic gold on stars...


indigo toned background...


mixed media...


toned background with ink sketch...


colored pencils...


I didn't like the way it was looking, so I painted over the figure with open acrylics and used a black gel pen for emphasis. Experimenting...

Now on to the next exercise, which is to paint the 10 teabags, which I have already prepped and drawn off, in the same session with a time limit. I may have to re-watch the video, as it's been a while!

I'm also working gradually on projects for other classes, plus some fabric projects. So, stay tuned!

The light glared on the first two some. I don't have the best lighting, or room, to take the pictures. :/

Keep doing what you love! :)

Sunday, April 22, 2018

Class 9 PYH&S 2018-"Joyful Journey" Mixed Media Storytelling

This class in storytelling with art was a lot of fun, and was inspired by Pia Rom's class in Paint Your Heart and Soul (link on sidebar). It is mixed media on paper in my journal (hers was on canvas or board) and involves painting, collage, and imagination, as well as other media, whatever was handy


First layer of black and white collage elements includes a few magazine images, a printed off pinterest image from another project, torn music pages from a piano book, a circle punched out, some book text, a value scale from another project, an original photo reversed and printed, and two recycled teabags that I experimented with prints and gold leaf on, basically whatever was laying around my workspace. 


I didn't necessarily follow the teacher's instructions in telling this story. I watched all the videos, then did the piece from what I could remember of her techniques, which means I might have left out some of hers and added in some of mine. 😳 Anyway, I added a layer of drawing and paint to tie the images together.


Added more drawing with a black stabilo pencil and acrylic paints, covering some images and bringing out others..


I added a wooden fabric stamp with black paint and tried to make the figures on the left look like one is pulling the other out of water, not very successfully, but I tried. I kept fiddling with the overall piece until...


it looked like this and I could live with it. There could be several stories going on here! I deliberately left the name of our town's old theatre backwards, and the seal represents the river running by our town, although we actually have no seals here in the south. It's kind of like a "fish out of water" thing, because I have always felt like a fish out of water.

When I look at this piece, it brings up all sorts of emotional stuff for me, even though the first layer of collage images were picked up and glued on randomly. It tells a story of me!

Perhaps one day I will write text to go with my art, because when I look back at older pieces, I can relate to when and what was going on with me when I created the drawings and paintings! I look forward to doing that.

Keep creating whatever you love! It's good for your soul! 💝

Saturday, December 2, 2017

Tiny Bags of Love-Warm Up Intuitive Portrait

Intuitive Portrait- Images emerged from the tea stains- Stabilo black pencil, open acrylics, inktense pencils on recycled teabag.


I used clear acrylic to prep the square teabag, which made it kind of gritty, which I don't necessarily like. I didn't prep the teabags I painted before the class at all, and I'm thinking I like the unprepped bags better, but I'm experimenting and learning here, so we'll see.

I like how this one turned out. Unfortunately, I haven't painted in a couple of weeks, so this one is the only one finished for now. This is a busy time of the year, so it may, or may not be, after Christmas before I get to paint with any consistency again. Looking forward to it!

Tiny Bags of Love- (Teabag Art-Prepped Teabags-Sketches)

Tiny Bags of Love class with Jeanne-Marie Webb on Ivy Newport's site (see link on sidebar), a class on painting recycled teabags. I watch and learn from the videos, but my procedure is not necessarily the same procedure in the classes.


Used Teabags Drying...


emptied and a coat of clear gesso on all the tagged bags and about half the square tagless ones that I had previously dried and emptied...


intuitive sketches for paintings on 10 square tagless bags and 2 regular teabags, one with missing tag, over clear gesso with Stabilo water-soluble pencil, letting tea stain images emerge-Ready for color! I did get ahead of myself here. This exercise was meant for later in the class, so I will practice with these and start from scratch on the right exercise later...


Went over Black Stabilo pencil lines with water brush and put the first layer of paint on one character...

The painted face is continued in the next post. These are so addictive!