Monday, June 29, 2015

Stencil Cutting Practice

Been practicing cutting my own stencils and masks and trying them out in one of my art journals. All of the try-out journal pages will be worked on further, so these are just beginning pages and are still works in progress...


Journal pages, of various papers, where I tried out the stencils cut from Graphix stencil blanks at the top, and the stencils/masks at the bottom. I know they don't look perfect, and they aren't, but I happen to like wonky and imperfect! :) I used open media acrylics dabbed on with a stencil brush for these pages...


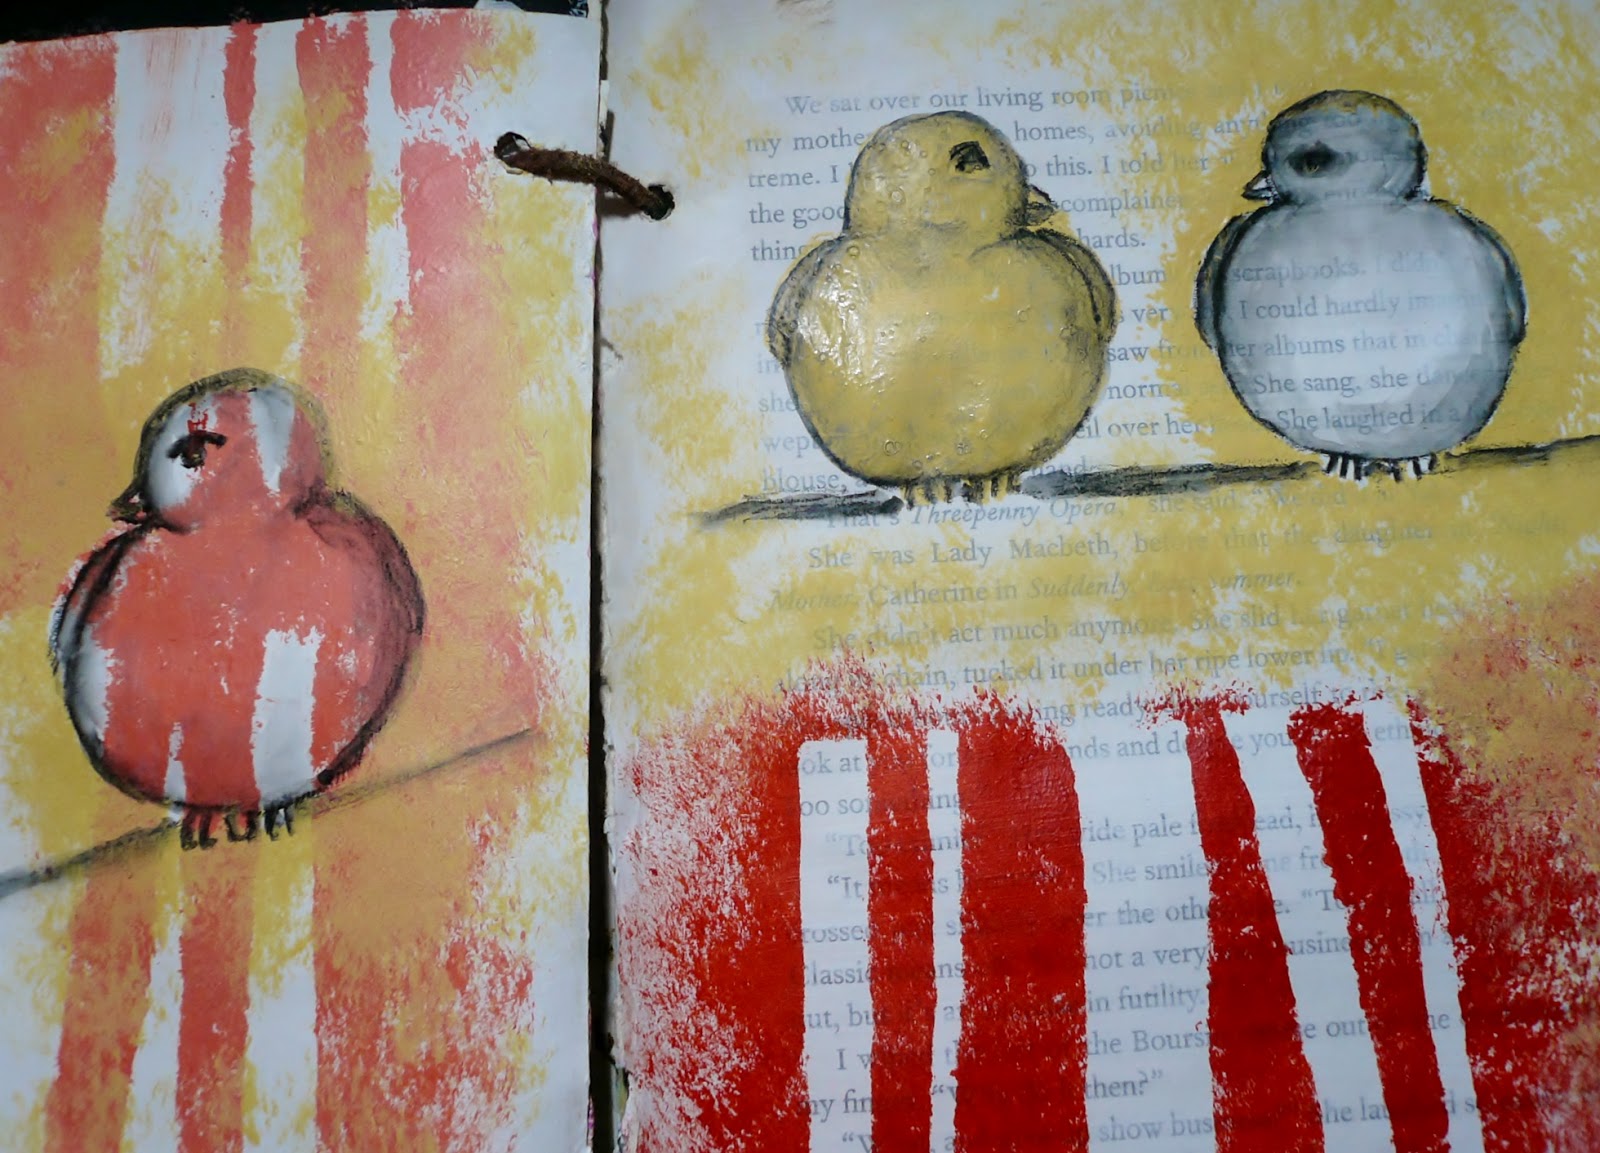
The same journal pages after I added some marks all pencil to the birds/chicks to further define them. I like them! :)


Journal page try-outs on the top on gessoed and patterned paper, with open media acrylics; stencil and mask on the bottom! Bare beginnings of the pages.


I cut these stencils/masks from a blue transparent Graphix stencil film, on the bottom, and tried them out on journal pages of various backgrounds and papers by spraying Delusions Inks on them. I have since done more work on them, but don't have pictures yet.

I'm staying with very simple designs to learn on, and I think I'm getting better with every one. I've had trouble with my stencil cutter getting too hot and causing the point to bend while I'm cutting. I'm going to try a different point next time, and if that doesn't work, I'll retreat to using an x-acto knife again. They're pretty dependable for lots of things!

Have a great week!


Animalitos Cats and a Stenciled Hand

A kitty pair inspired by the inky animalito class (see sidebar for link)...


I probably should have put some sort of background, and I may at some point, but here they are with some pen and marker work added...


I decided to add a background with Gelatos and brushed them around with water...


and a journal page using one of my handmade stencils with dylusions spray ink and a gold gelli pen, which will probably have more elements/words added later.

Both were a lot of fun to do! Still need more practice though!

Sunday, June 21, 2015

Animalitos Flower Garden Rabbit

I forgot to make progress pictures, but this is a journal page with a flower garden bunny inspired by the Animalitos class (see sidebar for link). I didn't intend the bunny to be black, but I guess that's what he wanted to be, because that's how he turned out! And, yep! I do like dots! :)

I just had fun with him and the flower garden...


This is mixed media (acrylics, inks, handmade button stamp, markers, gel pens, paint markers, collage) on a black gessoed paper journal page. I could have kept fiddling with it, but I decided to let him be, at least for now! I may have already made it a little too busy. I used a bunny picture from Pinterest as inspiration. The light glared a little bit on it. I'm still trying to find the time and energy to clean and re-organize my work space, so I can take better pictures.

Meantime, I'm just going to persevere with my creativity and see what else I can come up with!

Hope you enjoy my creative adventures, and that you're having some of your own! :)

Sunday, June 14, 2015

Tyger, Tyger in the Night! (Animalitos)

Another Animalito inspired by Tracy Verdugo (see sidebar link). This time a tiger study on cardboard, using acrylic inks and paint, markers, marks all black pencil, gel pen, and collage.

This is my first ever tiger, and I was supposed to paint loosely with a big brush. I didn't have a big brush handy when I started (I need to dig it out), so I used about a half inch one. Of course, by the end I was using a tiny brush, because that's just the way I am. I have to make everything complicated!


A start...


a close-up...


and this is how I left him when I decided to stop fiddling with him and let him be!

I used an image off Pinterest for inspiration, and also inspiration from Tracy's class. Definitely a new experience, and an adventure!

Have fun with your creativity this week! :)

Friday, June 12, 2015

Stencil Cutting


My very first attempt at cutting a simple stencil from mylar with an exacto craft knife. You can see, I had no idea what I was doing! It came apart on the spaces between the houses, but I was determined to paint at least one stencil with it in my sketchbook, and I used Gelatos. It turned out rather well, I think, but I don't know how! This stencil has now been retired. :)

I thought I might do better with a stencil burner, so I purchased a multi-tool that is a stencil cutter, wood burner, and soldering tool.

I must have already shared the first attempt with the stencil burner, because it's not in my drafts. Anyway, the burner got so hot that it softened the tip so much that it wouldn't stay hard enought to burn on the lines, and it kept bending sideways, making too wide a cuts. I thought maybe the tip was loose and had hubby to tighten it for me. I put it away for a while.

This morning I got it out again with some Graphix Stencil Film and tried burning a bird and a paisley shape, after sketching them off with a pencil.


The stencils and blanks turned out pretty okay, considering that I had shaky hands, and after I burned the bird shape and part of the paisley, the tip, again, got so hot that it was bending sideways with the least bit of pressure, so I unplugged it to cool off. I guess you're only supposed to cut a few minutes and let it cool, etc.

 I also got the space between the bird legs too thin and it came off. I was going to glue it back, but it got lost somewhere on the table. I got three shapes from the paisley cutting, which I like.


A trial of the stencils/blanks from this morning in an art journal, using Van Dyke Hue open media acrylic and a stencil brush. Marks were made in the stenciled ones with a bamboo skewer while the paint was still wet. These were made on gessoed paper, and the lower left is on the back of wallpaper. The background will be filled in later, as well as, inside the other designs.

The burning/cutting may be a little ragged, but I like it on the pages, so I will keep these for sure. Can't wait to use them with my Gelli plates!

The thing about making your own stencils, stamps, etc., is that they will be uniquely mine, wonkiness and all. Nobody else's will be like them. Of course, I do have some bought ones that would be way too time consuming and complicated to make myself, and I love those also. So, it's all good! :)

Another new experience and a batch of fun! Now, all I need is practice!

Happy Creating!

Monday, June 8, 2015

More Inky Animal Practice!

This time a menagerie of inky animals. Such fun!


I could keep adding marks to them, but I'm stopping for now and moving on. I have a feeling that these will be cut out and added to journal pages at some point!

Inspired by Tracy Verdugo's Animalitos class (see sidebar for link).

Happy creating!

Friday, June 5, 2015

Mixed Media Dove


I put the Animalitos label on this one, but actually, I created it before I decided to take Tracy's class. I have her book on Mojo Painting on my laptop and was reading it. This is a 6" x  6" gallery wrap canvas, and I just started layering collage, acrylic paints, handmade stamps, and one tiny bird stencil in the lower right corner, until I saw an image start to come forth. Can you see it?


I tried to lighten the background some and put a layer of white over the image...


I re-stamped the star and heart stamps to darken them and the tiny bird again and added another layer to the dove...


A bit of black stablio pencil to emphasize a few things, and see the tiny dark bird lower right behind the feather? I could keep doing stuff to it to make it better, or maybe worse, but I like it at this point and am calling it done for now!

Happy weekend and happy painting! :)

Thursday, June 4, 2015

Button Stamp

I tried out a button stamp I made the other day. I had been thinking about doing this for a while and finally got around to it.

I used gel medium to glue several buttons to a cd case top and let it dry, thinking it would make a good tool for my gelli plate. I first tried it to lift paint from the mini gelli plate in an art journal (left page). I stamped it on top of some other layers with the gelli plate and stamped the paint I had lifted on the opposite page, and it didn't work too good, but the pages weren't on a totally flat surface. I'll try again later on a flatter firmer surface, and maybe different paper. The left page is actually the back of a canvas, which is kind of rough.

The stamp did work good, however, using rice paper laid down over the buttons with paint applied to them, pressed, and lifted. I like it, so the button stamp will definitely not go to the trash bin. :D


Can't wait to make some more pages with it! :D