Saturday, December 31, 2016

HAPPY NEW YEAR 2017 Self Portrait Photo


After lying in bed a couple of mornings ago looking across the floor to the remnants of Christmas at our house, coupled with other "stuff" that has piled up on me, and needs desperately to be put away, I turned on the lamp and sat up on the edge of the bed to put my fuzzy sox on. When I straightened up, my eyes caught on my image in the closet door mirror, just beyond the chaotic mess staring back at me. My camera happened to be on the beside table, so I picked it up and snapped a photo of the clutter, including me (my mind is so cluttered I can barely think anymore). They say that your outside environment matches the condition your mental, spiritual, and physical body are in on the inside. That may very well be true. If it is, then Lord help me, because I'm in trouble! My house could be on Hoarders! 😲

Anyway, today is New Year's Eve, and this is my last post of the year. So HAPPY NEW YEAR 2017, and I pray that whoever reads this is blessed beyond measure in the coming year. May we all have a wonderful and CREATIVE year, no matter what our passions are, and may I get the energy from somewhere to clean up our house!

Postscript

I had several unfinished post drafts that have been here for a while. Today, on the last day of 2016, I decided to write the text and post them just as they are, unfinished projects and all.

The reason for this is that each year I have a book printed of my blog posts, and I got way behind on my posting this year, yet I wanted them included for this year in my book, hence so many posts right at the end without the finished projects. I will share the completed projects/paintings as they are done!

I apologize for any mistakes in the text of these posts. I have posted the last dozen or so this afternoon, and I'm afraid I was in a hurry and didn't go back and proof read them. I only had a limited time to end the year for my book. Again, sorry!

Thank you for your visits and your support! Looking forward to more blogging and creating in 2017! See you then!

Mini Mojo: Textures, Marks, Colors/Self Portrait

These are hideous stages of a large 20" x 20" gallery wrap canvas acrylic painting inspired by Tracy Verdugo's Mini Mojo class on textures, marks, and colors (see sidebar for link). I'm in the middle of the class and this part is a self portrait in living color, so I snapped a few pics and began the adventure!


Painting the negative space in the first layer of color...


Adding a second layer of colors and shapes; I know it's plumb scary looking!


More paint layers and shaping! Looks a little better, but still have a long long way to go! This is where it's at for now. Praying that it will look much better when it's done! My muse took off on me for several months, then the holidays came and life got busy, so I haven't painted, or created anything else, for that matter, in a while. Hopefully, I'll have more creative time and energy this year and get a lot done. I'll share the finished portrait as soon as it's done, ugly or not!

I have a lot of unfinished paintings and journals, plus several unfinished classes and workshops, and one that I haven't started yet that I'm dying to get started on. Too many things to try and do and too little time to do them! Maybe I will get some of them finished this year and I can share with you the good, the bad, and the downright ugly! Fingers crossed!

More Quick Sketches and Contour Sketches

Sometimes I sketch while waking up in the mornings, especially if I'm having to go somewhere. These are the latest ones, mostly sketched last week. Not pretty, but fun to do and keeps me in practice!


Quick sketch in black stabilo of a wig on a styrofoam wig head, using white stabilo pencil trying to lighten some areas. I shouldn't have!


Ballpoint pen of me sitting on the edge of the bed looking in the closet door mirror, trying to do a quick contour sketch. NOT trying for a likeness!


Another quick contour sketch from the same place next morning with a ballpoint pen...


Another quick contour sketch with a ballpoint pen from the same place the next morning, only this time I got creative and put a scarf on my head..


Moving on to my little bear collection at the foot of the bed, a quick contour sketch of two of my favorite little bears, also in ballpoint pen...


Muffy Vanderbear and her horse Oatsie, a quick contour sketch with a black gel pen. My husband gave these to me for Christmas years ago. I've always loved them!


I used to have a terra cotta ceramic angel like this on a shelf, and one day I surrounded it with magnolia blossoms and made reference pictures for painting. I did do a watercolor painting of it and just recently took it down to hang another painting. Unfortunately, I broke the ceramic version one day. Anyway, the watercolor painting was sitting on the chest of drawers looking at me, so I did a very quick contour sketch in black gel pen of just the angel sitting alone on the shelf blowing kisses.

As I said, these are not pretty, but that's not the idea. The idea is to keep in practice and to create something every day, even if it's raw and ugly and imperfect. That's how I get better at what I love to do, hopefully!

Don't give up! Keep creating!

Bunny Mojo Ptg

This large painting on 18" x 24" mixed media paper was inspired by Tracy Verdugo and her book, Mojo Painting.

 I just started smearing acrylic paint around with my hands and fingers...


added more acrylic paint colors, shapes, and marks with various tools and brushes that I had laying nearby, and I added the rabbit face and ears, because I saw him right away in the first layer of paint...


more layers of paint, marks, colors, some stamping and stenciling, etc....


images are appearing. I decided to paint around the images, letting previous layers peek through...


and this is where it's been for several months now. Not liking it all! Trying to decide whether to keep working on it or cut it  up to use in other projects. Either way, it was fun to play on! If I keep working on it I'll share it when it's done!

Mystele-Gelli Prints Class


This is a workshop that I started with Mystele Wonder Works, using different paint marks and acrylic colors on a gelli plate, then stamping them onto mixed media paper, layering them over one another. I was inspired by Mystele to get this far, but I have no idea where it will go from here, but when I'm finished layering I will pull out and emphasize the things I want to be prominent. Fun stuff!

Animalitos: Inky Bird Card


A card inspired by Tracy Verdugo's class, Animalitos (see link at side), using acrylic inks. He is also a work in progress, but I love him so far. Just needs tweaking some, and some legs and an eye. Will share again when he's finished!

Quirky Doodle Bunny Painting

This is what I call my quirky doodles and painting! I love to pull the images out of these lines!


I closed my eyes and, with a pencil, lightly made random lines all over the mixed media paper (Can you see any images within the lines?)...


These images emerged from the lines for me, so I darkened these lines and added eyes, petals, etc....


Added watery indigo acrylics to background and shadows...


I have no idea why I decided to paint the bunny and the sky red. I guess I was thinking to warm up the layers to go on top of them? It seemed like a good idea at the time!


Painted blue plus white acrylics in the sky, greens in the grass, burnt umber? over the sunflower centers, and white over the bunny. Now he's pink! I briefly thought about keeping him pink...


but later decided against it and added more thick white paint to the bunny and the sky, and petals to the sunflowers, and this is how he is for now, as a work in progress. There is much to be straightened up and tweaked before I call him finished. I will post a picture when he's finished!

Frolic Bunny Workshop

These were inspired by a workshop with Mendy Lacefield, and were done quite a while back. I was waiting til I got the second one finished before I posted, but that could be a while.


This bunny and writing is my original stuff in mixed media. It's finished, I think!


 This bunny was also mixed media and painted using Mendy's pattern, which also taught us how to make her faces. It's not quite finished yet. The wild turkey feathers aren't a part of it. They just happened to be there! Fun workshop!


Animalitos: Landscape

Inspired by Tracy Verdugo's class, Animalitos! See link on sidebar!


Playing with acrylic inks: first, a landscape experiment, and I started an inky owl, but didn't complete him. Maybe I will someday! And I need to bring out the images in the landscape too. Can you see any images?

Review: Moo Carve carving blocks

I hate to talk negative about anyone, but I tried the Moo Carve  blocks to carve my own stamps back at the first of the year, and wasn't happy at all with it. It was a waste of money, as I wound up ordering the speedball carving block anyway.

Moo Carve is soft and carves like butter, but is much too flakey and easy to break and chip off, both while carving and stamping.


For practice, I carved a small cross, added ink, and stamped a few in my journal.


One side broke off while I was stamping. I also had to be very careful while handling them. The least bit of pressure on the edges would break little chunks, or rolls, off.


I also carved a heart and tried stamping with it on the same journal page.


You can see on the red hearts that the more I stamped, the more it came apart.


This is the last thing I carved with the Moo Carve, a bird. It was the worst of all; I guess because it was bigger. It started breaking apart as soon as I started using it.

So the Moo Carve is sitting on a shelf, til I can figure out some other use for it. Some of you may love it, and that's fine, but it's not for me. For the time being, I will stay with the Speedball carving block, which I'm going to use as soon as I find my stamp carving tools. Sorry Moo Carve! I really wanted to like your product!

Ballerina Mandala

I don't exactly remember where I got the idea for this project, but I was playing around with different techniques that I've learned from various online teachers (Thank you all so much for sharing your art and yourself with me!)

I'm going to have to start writing the text to go with the pictures as I add them to the drafts. After a while, I get involved with other projects and forget what exactly I did the ones I already have in progress. Or maybe make notes!


Anyway, the substrate is cradled birch panel, which I failed to sand to smooth it out, thus it has kind of a rough texture showing through every other layer. I marked the center with a pencil, then applied indigo acrylic paint to, I think a stamp rectangle cut out of a foam plate, then applied the stamp to the edges, overlapping the ends.


The circle stamp is the bottom flat part of a foam plate with white gesso applied and stamped/printed on. I thought I had it centered, but, alas, it wasn't!


I drew and cut out the ballerina stencil from a sheet of stencil stuff, and applied white gesso through the negative space centered over the circle.


Deep purple acrylic has been painted over the white circle, more gesso added to the dress, and some flesh color to the skin.


I know this is looking the same color, but the circle is deep purple acrylic, and I added more indigo acrylic around the circle. Wasn't loving the splotchy look! The circle has been divided into sections for zen doodling.


As of now, I have started the zen doodling in the circle with a white gel pen, and it's another work in progress project that will eventually be finished. When it is I will post it!

I know nothing about it is perfect, but everything I do is a bit wonky. I am imperfect, therefore, whatever I create is imperfect. That doesn't stop me from loving to try!

Great-Grandmother Melinda Oil Portrait

Although I never got to meet her, she died way before I was born, I've always been fascinated by my great-grandmother, mostly because she was full blooded Cherokee Indian, and I loved to hear my Granny Prater sing her name off and tell me about her mother-in-law. I still love her name, which was Melinda Lucinda Valentine Sanders Prater. Isn't that a catchy name? I seem to remember that Granny said they called her Lucy!

Someone gave me an old black and white photo of my paternal great-grandparents, which I love, and I enlarged and printed it off on paper, cropping her head and shoulders, to paint on a six by six inch gallery stretched canvas.


Again, it's been a while since I started her, but I think I used a black stabilo pencil to sketch her off, then used a damp brush to shade her features.


Went over the background with burnt and raw umber oil paints


Added a little ochre oil paint to the light parts...


and a little flesh color, hair color, and some definition of features and dress. Her eyes aren't actually closed in the photo, but when I blocked her face in, I kind of liked them closed, like she might be praying, or really listening.

This is as far as I've gotten on this last day of 2016 on her. She is a long way from being finished, but one day I will pick her up, add more layers of oil paint, and possibly some cold wax, to complete her. When I do, I will be sure to post her!


Doodle Canvas/Monoprint

Today is New Year's Eve, and since I want some of my drafts for posts of work in progress projects included in my printed book, I'm going to try to include as many as I can today, so they will be dated 2016.

There are a few that I, for sure, want included, but there are some that it doesn't matter, so let's see how many I can post today. Here we go!😎


The painting on the left is on paper, but I don't remember what kind, as it's been a while since I did it. I did a monoprint of colors on it, then dripped india ink and let it run. I will eventually add more to it. The canvas on the right is where I doodled with various acrylic paints and ink, marks, drips, runs, etc., just playing and experimenting.


Same canvas in both pictures, but I'm still playing and manipulating stuff, trying to pull out images.


For some reason, I decided the canvas wasn't working like I wanted it to and covered the whole thing in modeling paste, giving it lots of texture, drew into it with a bamboo skewer stick, and changed the color palette. I kind of wish I'd left it as it was in the first couple of pictures, but I didn't, so here it is, as it is for now, still waiting to be finished.

I have so many unfinished paintings and projects that it's not even funny. I'm much braver about starting them than finishing them, I'm afraid.

Tuesday, December 20, 2016

First Fabric Journal-Part 1

I kept seeing wonderful, gorgeous, fabric books online, and I decided that I HAD to try making one. I watched several youtube videos on fabric books, and adapted them according to what materials I had on hand. One of my favorite videos is https://www.youtube.com/watch?v=ymUmZ6IHtqM       Annie is msgardengrove1


I cut two lengths for the cover and pages for the base out of a quilted cloth placemat to give it some sturdiness, cut enough lace fabric and muslin to cover both sides of the cover and inside pages, pinned them, and sewed them together. Then I sewed six lines dividing the middle into pages, and leaving enough room for thickness of added elements.

I think I cut the two lengths 6" x 12", so the book, when closed is 6" x 6".


This is how it looked, opened, and before I added anything else to it. I'm not the best seamstress, but all of this will be covered up anyway.


I learned how to make handmade fabric flowers online, gathered up different fabrics, and tried different flowers...


Net pompom flower and my mom crocheted the two little doilies to use for flower centers. I could have crocheted them, but she was crocheting big doilies at the time, so she did it for me.


Using a hot glue gun, I glued a piece of an old kitchen curtain, some lace, and one of my handmade flowers to the front.


I found the trim for the spine at Walmart and glued it on. I love it!


The old kitchen curtain was continued  on the back cover, and I added another handmade flower, buttons, and more lace with the hot glue gun.


Back on the front I added one of the little crocheted doilies to my flower, and a button for the center, plus more lace, buttons, a beaded piece of fabric from an old wedding dress, a gold angel button, a fluff of net, and more lace. I am doing this book in mostly white and shades of cream. At least that's what I have planned for now.


The front and back cover, opened up. The front has several layers on it already, and I will add more to the back as ideas, or fabrics, come to me.


I decided to use it as a photo album, and scanned photos of my grandparents, parents, my husband and me, and our beloved little fur baby, Kibbles into the computer and printed them off in black and white onto muslin and cut them out. The left page holds my paternal great-grandparents, and the right page has my paternal grandmother. I hot glued muslin pockets onto both pages, strips of white satin left over from my cousin's wedding dress, then the photos.

I started this back in the summer, but my muse ran off, and life happened, and this is as far as I've gotten, but I have collected lots of stuff from old clothing that I can no longer wear, other crafts, and the Goodwill store is a gold mine of fabrics and laces to use, especially if you don't want brand new embellishments.

 Each page will have multiple layers of fabrics, laces, doilies, and other embellishments. Looking forward to getting back to work on this one and finishing it! Will share more as I work on it!

 I already have another one cut out to start, hopefully in velvets! :o

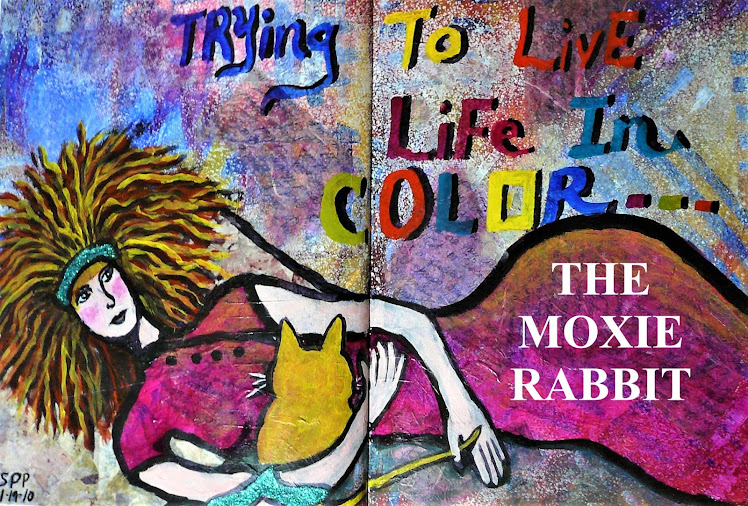
Do something that feeds your soul and makes you happy every day!